| About | SS&S | Music | Anime | 3D | Wallgames | Betsubetsu | Others... |
| SY99 Disk | FM Tutorial | Effects | My Music | Programming |
| Removal | Ribbon | Adapter | Bracket | Install | Tidy up |
| Socket adapter board | ||
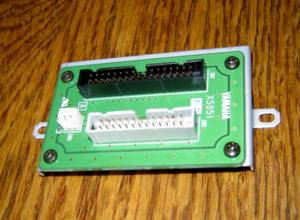 |
The replacement drivce has a different pinout on its ribbon cable, so this tiny new board is used as an adapter. The adapter board needs to be assembled so that the pattern on the PCB matches the hold in the little supporting bracket. But it was not obvious if the PCB should be above or below the bracket. |
|
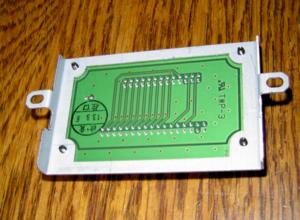 |
In the end, I chose to put the PCB on top of the bracket as shown here. The clearances for the solder joints shown here were better, and when I did a test assembly of the bracket on the floppy drive in the SY99 there seemed to be plenty of room (it didn't stick up so high that it would press against the metal plate bottom cover), so I did it this way. I noticed that the supporting bracket had two lugs that seemed to fix its orientation on the floppy drive bracket, and this was consistent with the ribbon cable placement, so this is how I arranged it. Having a good grasp of topology and 3D spatialisation is often a useful attribute in this type of work! |
| Back to the main description page... |
| About | SS&S | Music | Anime | 3D | Wallgames | Betsubetsu | Others... |
| SY99 Disk | FM Tutorial | Effects | My Music | Programming |
| Removal | Ribbon | Adapter | Bracket | Install | Tidy up |
 |
| © 2004-2008 Martin Russ |